
Well, I’ve made it to adulthood- I have a blog and a serious relationship. (Side note: when Craig read this, he said “wait, we’re in a serious relationship?!?” Yep, we sure are!).

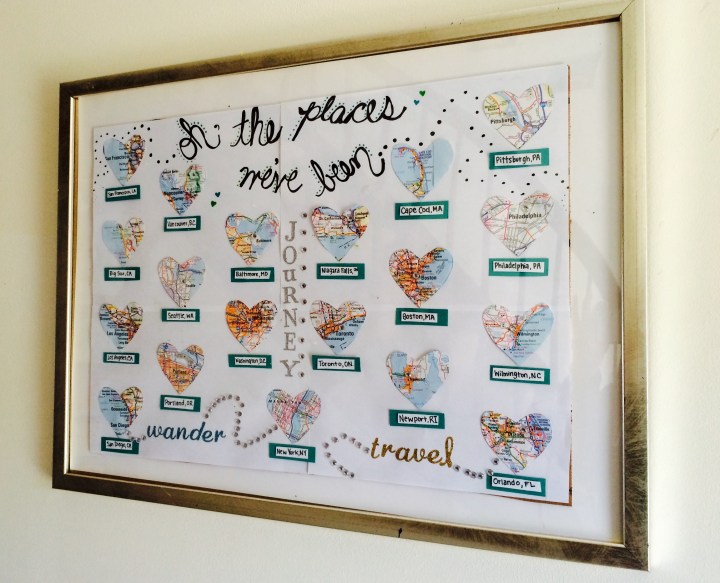
We’ve had some great times discovering new places in our two years of travel, and I wanted to commemorate that in my anniversary present. Last year I made a scrapbook of all our adventures, so I stuck with that theme again. This framed art is easy to make, customizable and super thrifty! 
Materials: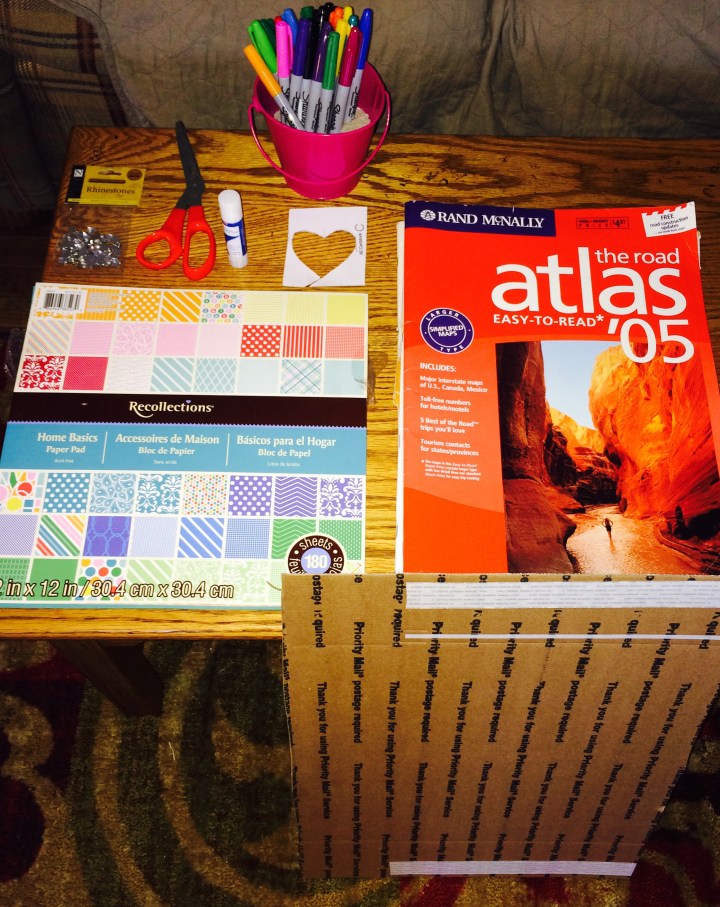
- Atlas or printed maps
- Heart stencil (I made my hearts 2.5 in x 2.5 in)
- Scrapbook paper
- Poster board or other white backing
- Frame (size depends on backing)
- Glue, scissors, markers, pencil
- Stickers and embellishments
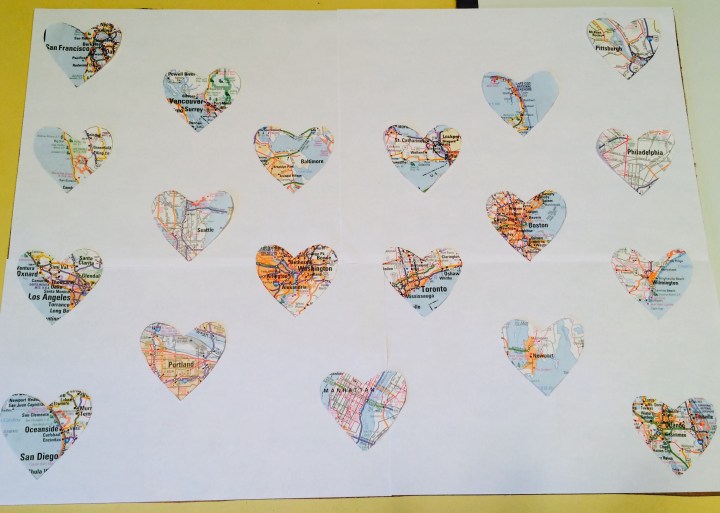
When I made a list of all the places we visited, it was pretty long so I decided to use a larger frame. I was too lazy to go out and get poster board (love you, I swear) so I used half of a postal shipping box and covered it in white paper (measures 15 in x 21 in).

A sheet of poster board cut to size or a smaller piece of cardstock would also work depending on how many places you’re going to include . A white background works best to let the map stand out.
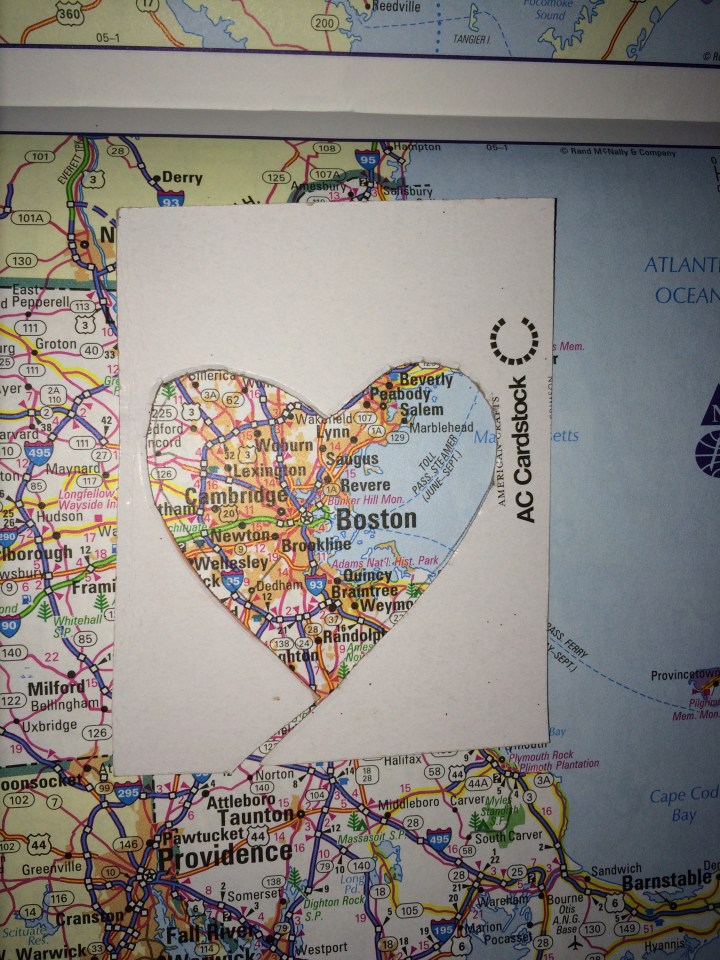
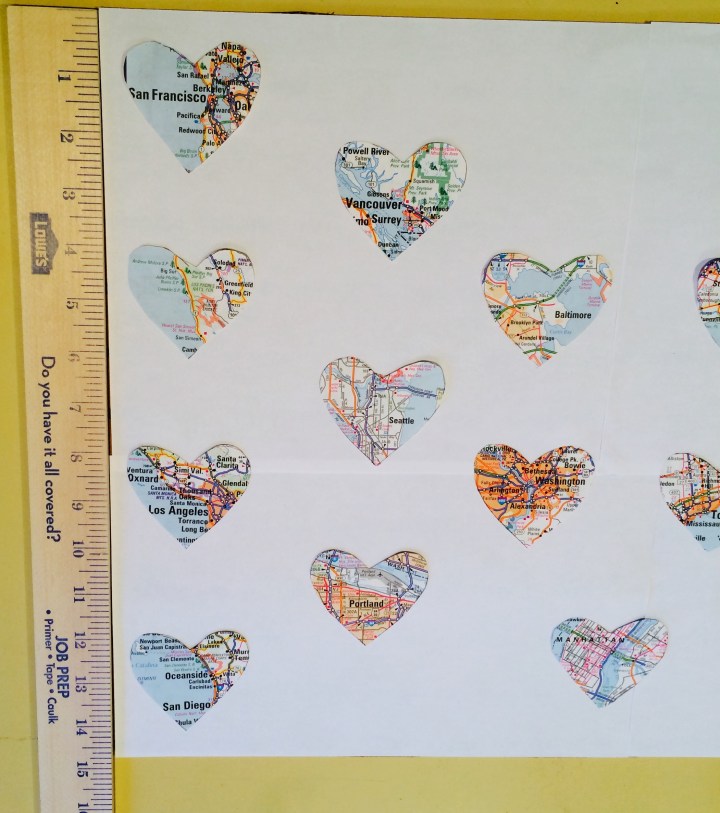
Use the heart stencil to trace around the cities on the map. I cut a heart out of cardstock and then used the outline so that I could see what I was including.
Get creative with your placement!. Obviously you want the city name to be the main focus, but I also tried to include the little places we went, like Craig’s hometown Quincy, and the parks we stopped in in California.

When I finished I had 19 heart maps, and was like omg, am I a jet setter?!? (Yes, yes I am).
 I grouped them by trip, and tried to keep it somewhat geographical (West Coast on left, East Coast on right). Since I had an odd number, I spaced them out in rows of different amounts, and placed them about 2 inches apart on the backing.
It takes a little bit of OcD to get them perfect, but using the ruler helps. Leave about a 1/4 inch around the edges to allow for the frame. Once you have a layout you like, glue those suckers down before your dog knocks it over like mine did.
 Cut 1/2 in x 2 in rectangles out of scrapbook paper. Solid colors work well to contrast against the busy maps.
Attach slightly smaller white rectangles for labels. 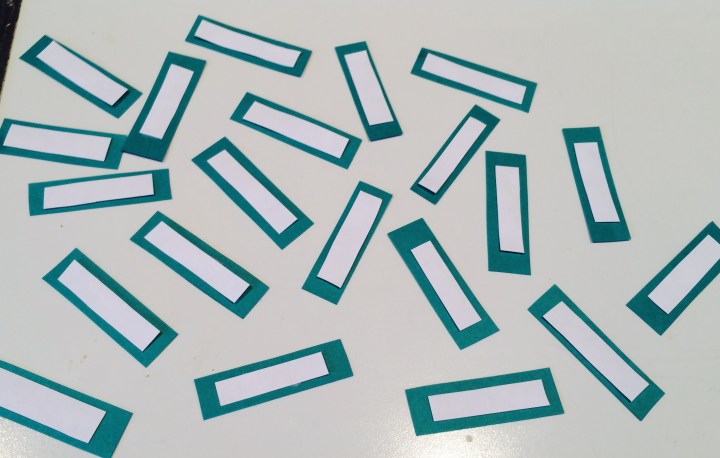 Either write or print out the location names (if printing, use a small font and trim to fit larger rectangle.)
It gives it a more polished look when they’re attached, plus I’m geographically challenged so it’s like a study guide.
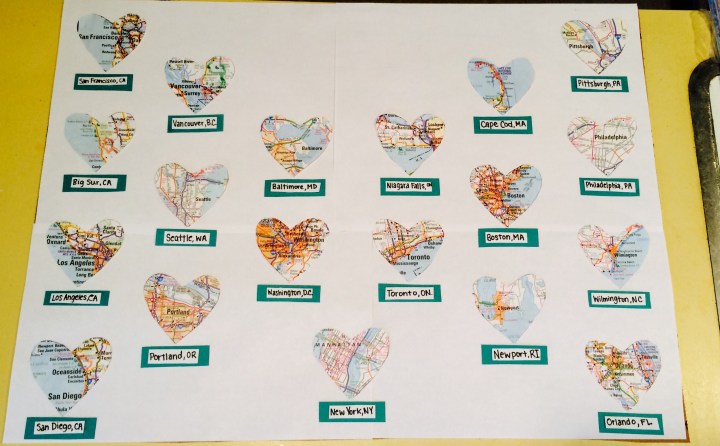
Embellish with a quote, gems and stickers for some flair

Pop it in a frame and voilà — instant present/wall hanging/bragging rights.